Skattejakt: Forskjell mellom sideversjoner
Ingen redigeringsforklaring |
Ingen redigeringsforklaring |
||
| Linje 10: | Linje 10: | ||
![[File:Th_reward.png|center|link=]] | ![[File:Th_reward.png|center|link=]] | ||
|} | |} | ||
Once the ship is on the way, you will see a countdown timer. If you come back in time and collect the reward quickly enough, you will be able to collect your reward and continue the journey. | |||
If you don't manage to make it in time, you will have to start over (you still get the reward though!). | |||
This process will continue until you reach the final chest, at which you will have to collect and restart, so you can do it again. | |||
''Don't be discouraged if you have to restart before then since you have unlimited tries! Now you should notice that you will get a greater reward from the 2nd chest compared to the 1st: the further you get into the Treasure Hunt, the greater the rewards will be!'' | ''Don't be discouraged if you have to restart before then since you have unlimited tries! Now you should notice that you will get a greater reward from the 2nd chest compared to the 1st: the further you get into the Treasure Hunt, the greater the rewards will be!'' | ||
Sideversjonen fra 21. jul. 2016 kl. 15:40
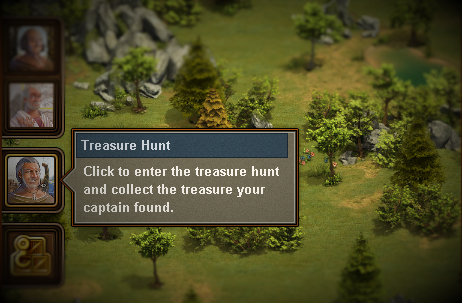
Getting started
The treasure hunt becomes available when the technology of Cultivation has been researched. Once done, you will see the icon below on your main city screen, just below your quest givers:
 |
|---|
How it works
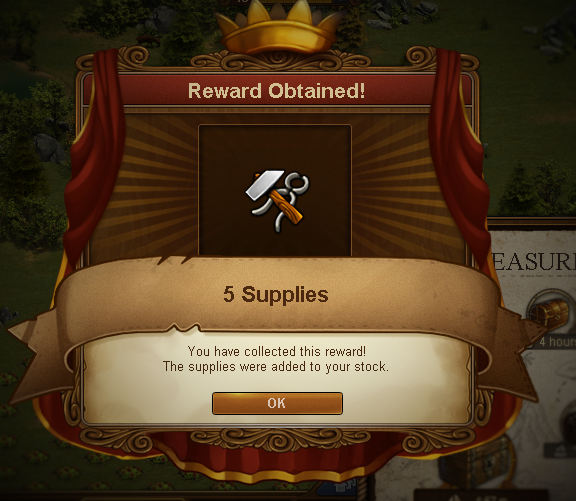
Click on the new captain icon to enter the treasure hunt. You will see that there are 6 chests on the map: 6 mins, 15 mins, 1 hour, 4 hours (twice), and finally the 8 hours chest. You may only sail in that order, or restart from the beginning at any chest. You will also notice that one of the chests has a button that says "Collect & Restart" or "Collect & Continue". When you click on the button, you will receive a reward:
 |
|---|
Once the ship is on the way, you will see a countdown timer. If you come back in time and collect the reward quickly enough, you will be able to collect your reward and continue the journey. If you don't manage to make it in time, you will have to start over (you still get the reward though!). This process will continue until you reach the final chest, at which you will have to collect and restart, so you can do it again.
Don't be discouraged if you have to restart before then since you have unlimited tries! Now you should notice that you will get a greater reward from the 2nd chest compared to the 1st: the further you get into the Treasure Hunt, the greater the rewards will be!
Rewards

|
Coins:
Coins are one of the main resources of the game that are primarily obtained from residential buildings (a.k.a. houses) |
|---|---|

|
Supplies:
Coins are one of the main resources of the game that are primarily obtained from production/supply buildings. |

|
Goods Package:
There are 5 goods you find in each age, and they are used to research many technologies, negotiate sectors, construct Great Buildings, and even more! A goods package awards each good of the player's current age (i.e. in the Bronze Age, you will be awarded 5 Stone, 5 Lumber, 5 Marble, 5 Dye, and 5 Wine if you win 25 goods). Note that the goods package always goes straight to your stock, which can be found by clicking on your Town Hall. If you are in the Modern Era or above, you will still get current/refined goods. |

|
Forge Points Package:
Forge Points (FPs) are used to research technologies and level up Great Buildings. A forge point package can be found in your inventory, and will add forge points to your forge point bar when used. A small forge point package adds 2 forge points to your forge point bar, a medium FP package adds 5 FPs to your FP bar, and a large adds 10! |

|
Medals Package:
Medals are used to unlock Victory Expansions in your build menu. When you win a medal package, it is added directly to your medal stock, which you can see next to your supply and diamond stock at the top-left corner of your screen. |

|
Blueprint:
Blueprints are essential for Great Buildings. When winning a blueprint, it will be a random age (ranging from your current age and below) and random spot. You can read more about Great Buildings by clicking here. |

|
Unit:
Similar to goods, there are 5 (normal) units you will find in each age. All units are categorized into Light, Ranged, Fast, Heavy, and Artillery, and each age will always contain one of each (in the 8-hour chest, each type of unit has a 5% chance of being won which totals to a 25% chance of winning a unit. They are used to fight neighbors, fight through sectors on your map, and even more! When winning a unit, you should be able to hover your cursor over it to see the stats on it. You can read more about units by clicking here. |
Chests
Rewards for each chest are shown below. Your prices are dependent in the age you are in (BA stands for Bronze Age, IA stands for Iron Age, etc.), and which chest you are collecting from.
Note: % is the pourcent of chance to get the reward
| % | BA | IA | EMA | HMA | LMA | CA | InA | |
| 50 | 150 | 210 | ||||||
| 50 | 150 | 210 |
| % | PE | ME | PME | CE | TE | FE | AF | |
| 50 | 280 | 360 | 450 | 600 | 850 | 1000 | 1150 | |
| 50 | 280 | 360 | 450 | 600 | 850 | 1000 | 1150 |
| % | BA | IA | EMA | HMA | LMA | CA | InA | |
| 50 | 35 | 345 | 480 | |||||
| 50 | 35 | 345 | 480 |
| % | PE | ME | PME | CE | TE | FE | AF | |
| 50 | 640 | 830 | 1035 | 1380 | 1950 | 2300 | 2650 | |
| 50 | 640 | 830 | 1035 | 1380 | 1950 | 2300 | 2650 |
| % | BA | IA | EMA | HMA | LMA | CA | InA | |
| 50 | 40 | 120 | 270 | 450 | 750 | 1150 | 1600 | |
| 50 | 40 | 120 | 270 | 450 | 750 | 1150 | 1600 |
| % | PE | ME | PME | CE | TE | FE | AF | |
| 50 | 2100 | 2750 | 3400 | 4500 | 6400 | 7600 | 8750 | |
| 50 | 2100 | 2750 | 3400 | 4500 | 6400 | 7600 | 8750 |
| % | BA | IA | EMA | HMA | LMA | CA | InA | |
| 35 | 120 | 350 | 800 | 1400 | 2300 | 3400 | 4750 | |
| 35 | 120 | 350 | 800 | 1400 | 2300 | 3400 | 4750 | |
| 30 | 2 | 2 | 2 | 2 | 2 | 2 | 2 |
| % | PE | ME | PME | CE | TE | FE | AF | |
| 35 | 6400 | 8200 | 10200 | 13750 | 19000 | 23000 | 26500 | |
| 35 | 6400 | 8200 | 10200 | 13750 | 19000 | 23000 | 26500 | |
| 30 | 2 | 2 | 2 | 2 | 2 | 2 | 2 |
| % | BA | IA | EMA | HMA | LMA | CA | InA | |
| 20 | 360 | 1050 | 2500 | 4200 | 7000 | 10500 | 15000 | |
| 20 | 360 | 1050 | 2500 | 4200 | 7000 | 10500 | 15000 | |
| 15 | 25 | 25 | 25 | 25 | 25 | 25 | 25 | |
| 15 | 5 | 5 | 5 | 5 | 5 | 5 | 5 | |
| 15 | 1 | 1 | 1 | 1 | 1 | 1 | 1 | |
| 15 | 2 | 3 | 4 | 5 | 7 | 10 | 14 |
| % | PE | ME | PME | CE | TE | FE | AF | |
| 15 | 20000 | 25000 | 31000 | 42000 | 58000 | 70000 | 82000 | |
| 15 | 20000 | 25000 | 31000 | 42000 | 58000 | 70000 | 82000 | |
| 15 | 25 | 15 | 15 | 15 | 15 | 15 | 15 | |
| 15 | 5 | 5 | 5 | 5 | 5 | 5 | 5 | |
| 15 | 1 | 1 | 1 | 1 | 1 | 1 | 1 | |
| 15 | 20 | 30 | 45 | 65 | 90 | 120 | 150 |
| % | BA | IA | EMA | HMA | LMA | CA | InA | |
| 15 | 1100 | 3200 | 7500 | 12750 | 21000 | 32000 | 45000 | |
| 15 | 1100 | 3200 | 7500 | 12750 | 21000 | 32000 | 45000 | |
| 25 | 1 | 1 | 1 | 1 | 1 | 1 | 1 | |
| 15 | 10 | 10 | 10 | 10 | 10 | 10 | 10 | |
| 15 | 50 | 50 | 50 | 50 | 50 | 50 | 50 | |
| 15 | 4 | 7 | 10 | 12 | 15 | 24 | 36 |
| % | PE | ME | PME | CE | TE | FE | AF | |
| 15 | 60000 | 76000 | 95000 | 127000 | 180000 | 212000 | 245000 | |
| 15 | 60000 | 76000 | 95000 | 127000 | 180000 | 212000 | 245000 | |
| 25 | 1 | 1 | 1 | 1 | 1 | 1 | 1** | |
| 15 | 10 | 10 | 10 | 10 | 10 | 10 | 10 | |
| 15 | 50 | 25 | 25 | 25 | 25 | 25 | 25 | |
| 15 | 60 | 90 | 135 | 195 | 270 | 360 | 450 |
**There is currently a 15% chance of getting a Surrogate Soldier and a 10% chance of getting a Recon Raider